Difference between revisions of "SHT1X"
Grovkillen (talk | contribs) m |
|||
| (6 intermediate revisions by 2 users not shown) | |||
| Line 1: | Line 1: | ||
= Introduction = | = Introduction = | ||
| − | |||
| − | + | [[File:SHT-11.jpg]] | |
| − | |||
| − | + | The SHT1x is a precise temperature / relative humidity sensor made by Sensirion. | |
| − | + | The SHT1x uses it's own protocol. Be aware: On first sight it looks like an I²C but it is not compatible to I²C. | |
| − | + | The types SHT10, SHT11 and SHT15 only differ in accuracy (and price, obviously). | |
| − | + | Typical accuracy (From Sensirion SHT1x datasheet) | |
| − | + | SHT10 ±4.5% rH ±0.5 °C | |
| + | SHT11 ±3.0% rH ±0.4 °C | ||
| + | SHT15 ±2.0% rH ±0.3 °C | ||
| − | == | + | = Precautions = |
| − | |||
| − | + | The SHT1x runs well on 3.3V so no level shifter or special power supply is needed. | |
| − | + | The bare circuit is very small and difficult to handle and solder. | |
| − | + | There are small printed circuit boards (PCB's) on the market making the handling | |
| + | much easier as they keep the needed resistors and capacitors too. | ||
| + | |||
| + | [[File:SHT-1X on PCB.jpg|500px]] | ||
| + | |||
| + | [[File:SHT-1x-PCB-Pinout2.jpg|500px]] | ||
| + | |||
| + | [[File:SHT1x-Pinout.jpg|500px]] | ||
| + | |||
| + | The SHT1x should not be used without protection against dust and condensing water. | ||
| + | Several cases for these sensors are in the market, some examples shown in the pictures. | ||
| + | |||
| + | [[File:Protective Case1.jpg|500px]] | ||
| + | |||
| + | [[File:Protective Case2.jpg|500px]] | ||
| + | |||
| + | An example for a completely mounted SHT-1x: | ||
| + | |||
| + | [[File:SHT-1X Mounting Example.jpg|500px]] | ||
| + | |||
| + | = Hardware = | ||
| + | |||
| + | Connecting the SHT1x is easy. | ||
| + | Just connect it as shown in the schematic, including the resistors and the capacitor. | ||
| + | The capacitor should be placed as near as possible to the sensor. | ||
| + | |||
| + | SHT1x ESP | ||
| + | GND GND | ||
| + | VCC 3.3V | ||
| + | DATA D6(GPIO12) | ||
| + | SCK D7(GPIO13) | ||
| + | |||
| + | |||
| + | [[File:SHT1x-Schematics.jpg|500px]] | ||
| + | |||
| + | = ESPEasy = | ||
| + | |||
| + | Set up the ESPEasy task according to the screenshot. | ||
| + | |||
| + | [[File:SHT1x Settings.jpg|500px]] | ||
| + | |||
| + | Submit your settings. | ||
| + | After some seconds the tasklist will show like this: | ||
| + | |||
| + | [[File:SHT1x Tasklist.jpg|500px]] | ||
| + | |||
| + | If it shows all values as zero, don't worry. | ||
| + | Wait a minute and refresh the browser page. | ||
| + | |||
| + | =Calibrating= | ||
| + | |||
| + | See "Basics: Calibrating" for further information | ||
| + | |||
| + | [https://www.letscontrolit.com/wiki/index.php/Basics:_Calibration_and_Accuracy] | ||
| + | |||
| + | == Your SHT1x shows deviating values == | ||
| + | This might have several reasons. | ||
| + | |||
| + | At first: Voltage regulators and the ESP8266 itself produce some heat. | ||
| + | This influences the temperature and humidity values of the sensor. | ||
| + | Put the sensor as far away from the circuits, if possible outside the case. | ||
| + | |||
| + | All sensors have their own tolerances. | ||
| + | On top the analog to digital conversion produces a deviation of | ||
| + | about ±1...2 digits. | ||
| + | |||
| + | It is possible to calibrate sensors using a formula | ||
| + | See "Basics: Calibrating" for further information | ||
| + | |||
| + | [https://www.letscontrolit.com/wiki/index.php/Basics:_Calibration_and_Accuracy] | ||
| + | |||
| + | Last but not least problems with the power supply are quite widespread. | ||
| + | See "Basics: Taming false positives" in the wiki for info about filtering power supply. | ||
| + | |||
| + | [https://www.letscontrolit.com/wiki/index.php/Basics:_Taming_false_positives] | ||
=== Optional settings === | === Optional settings === | ||
Latest revision as of 22:15, 18 October 2017
Contents
Introduction
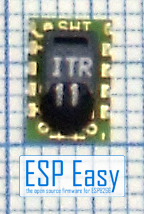
The SHT1x is a precise temperature / relative humidity sensor made by Sensirion.
The SHT1x uses it's own protocol. Be aware: On first sight it looks like an I²C but it is not compatible to I²C.
The types SHT10, SHT11 and SHT15 only differ in accuracy (and price, obviously).
Typical accuracy (From Sensirion SHT1x datasheet)
  SHT10       ±4.5% rH      ±0.5 °C
  SHT11       ±3.0% rH      ±0.4 °C
  SHT15       ±2.0% rH      ±0.3 °C
Precautions
The SHT1x runs well on 3.3V so no level shifter or special power supply is needed.
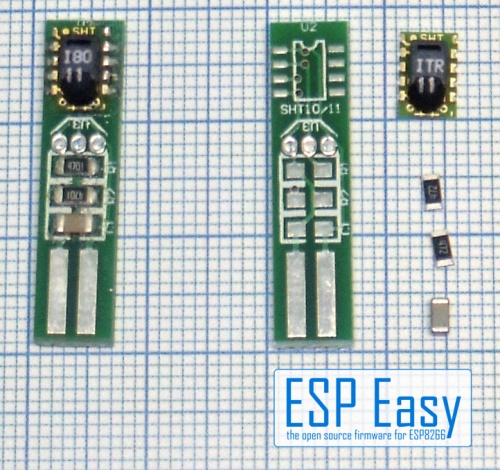
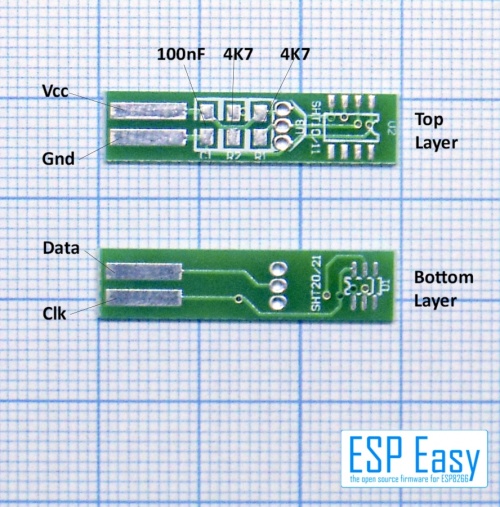
The bare circuit is very small and difficult to handle and solder. There are small printed circuit boards (PCB's) on the market making the handling much easier as they keep the needed resistors and capacitors too.
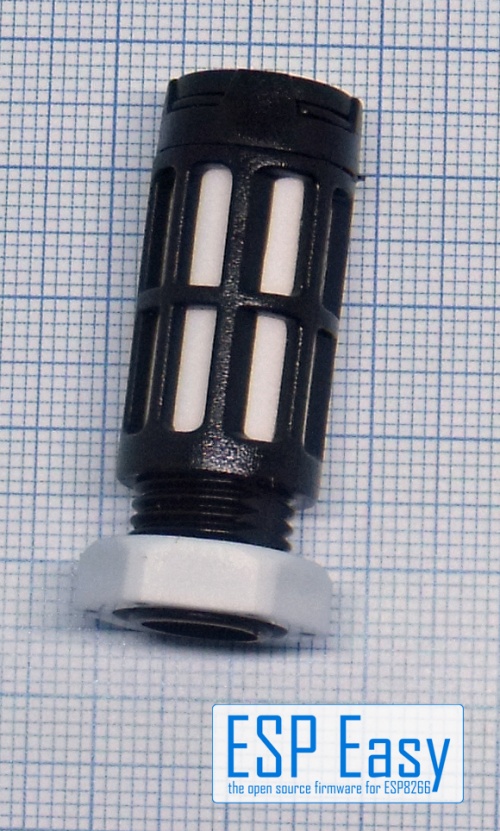
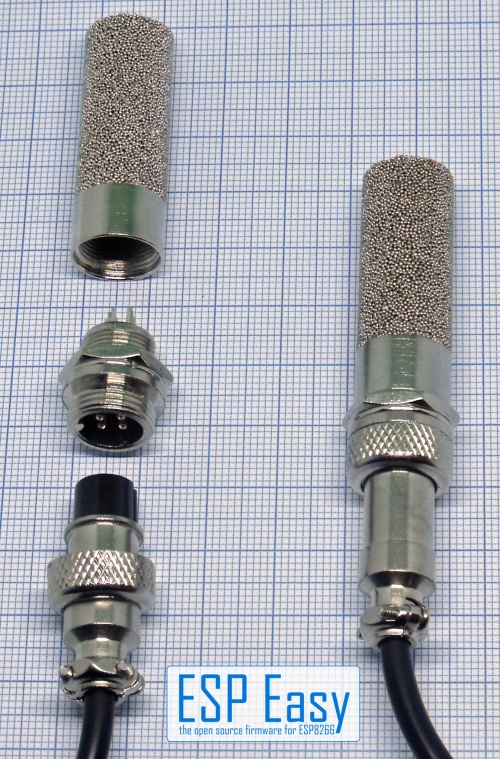
The SHT1x should not be used without protection against dust and condensing water. Several cases for these sensors are in the market, some examples shown in the pictures.
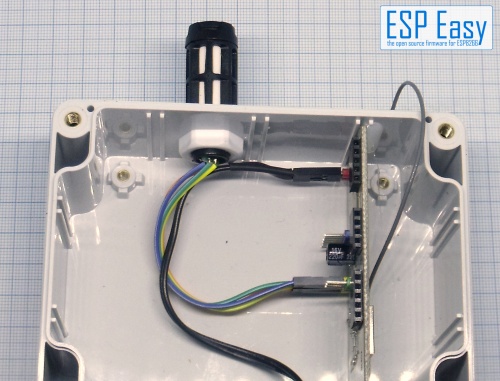
An example for a completely mounted SHT-1x:
Hardware
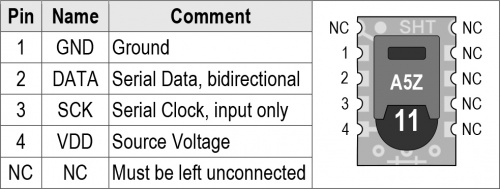
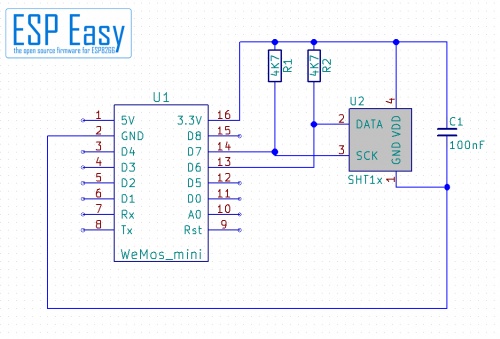
Connecting the SHT1x is easy. Just connect it as shown in the schematic, including the resistors and the capacitor. The capacitor should be placed as near as possible to the sensor.
  SHT1x		ESP
  GND		GND
  VCC		3.3V
  DATA		D6(GPIO12)
  SCK		D7(GPIO13)
ESPEasy
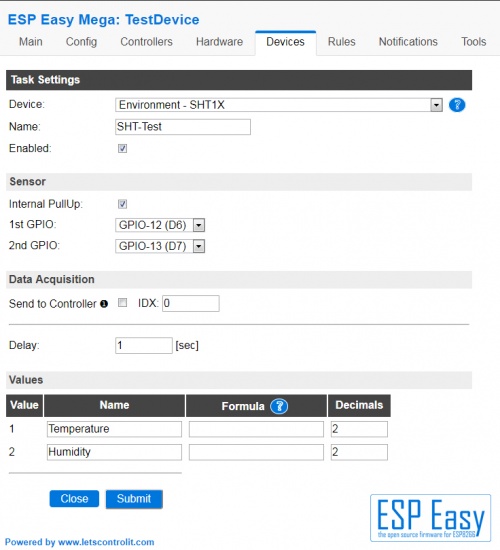
Set up the ESPEasy task according to the screenshot.
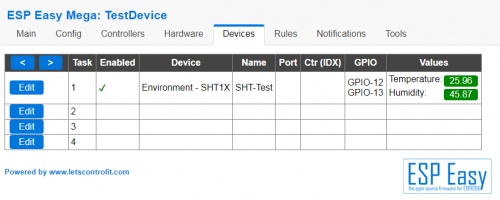
Submit your settings. After some seconds the tasklist will show like this:
If it shows all values as zero, don't worry. Wait a minute and refresh the browser page.
Calibrating
See "Basics: Calibrating" for further information
Your SHT1x shows deviating values
This might have several reasons.
At first: Voltage regulators and the ESP8266 itself produce some heat. This influences the temperature and humidity values of the sensor. Put the sensor as far away from the circuits, if possible outside the case.
All sensors have their own tolerances. On top the analog to digital conversion produces a deviation of about ±1...2 digits.
It is possible to calibrate sensors using a formula See "Basics: Calibrating" for further information
Last but not least problems with the power supply are quite widespread. See "Basics: Taming false positives" in the wiki for info about filtering power supply.
