Difference between revisions of "Relais"
Jump to navigation
Jump to search
| Line 18: | Line 18: | ||
<nowiki>http://<ip van ESP>/control/?cmd=GPIO,<pin>,1</nowiki> | <nowiki>http://<ip van ESP>/control/?cmd=GPIO,<pin>,1</nowiki> | ||
| + | |||
| + | Domoticz example: | ||
| + | ---- | ||
| + | [[File:Domoticz_ESP8266_Switch.png|320px]] | ||
| + | ---- | ||
| + | |||
== ESP Connexio == | == ESP Connexio == | ||
Syntax: WiredOut 1,On/Off | Syntax: WiredOut 1,On/Off | ||
Revision as of 08:13, 25 August 2015
Introduction
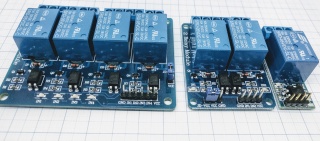
The ESP can control a relay board using one of it's GPIO pins. All relay boards that work with Arduino should also work with the ESP module.
Connect the relay boardj to one of the GPIO pins on the ESP module. In case of ESP-01, we will use GPIO-2
Hardware
Most of the relay boards expect a 5V ttl signal like many arduino boards provide on their output pins. But 3V3 logic should also work.
Software
ESP Easy
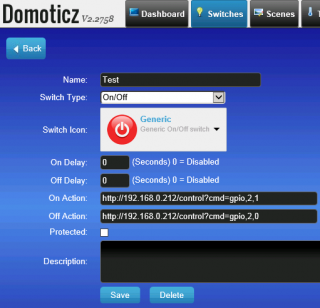
We can control the relay board with two simple http url commands:
http://<ip van ESP>/control/?cmd=GPIO,<pin>,0
http://<ip van ESP>/control/?cmd=GPIO,<pin>,1
Domoticz example:
ESP Connexio
Syntax: WiredOut 1,On/Off

