Difference between revisions of ""CO2 Sensor MH-Z19""
| Line 1: | Line 1: | ||
= Introduction = | = Introduction = | ||
'''This Plugin in currently only available in the latest build on [https://github.com/letscontrolit/ESPEasy/tree/mega github], but should in the next official release''' | '''This Plugin in currently only available in the latest build on [https://github.com/letscontrolit/ESPEasy/tree/mega github], but should in the next official release''' | ||
| + | |||
| + | It may be needed to build a custom image with this plugin enabled, because this plugin needs lots of iram, which is quite limited on esp8266. | ||
The ESP module can read the MH-Z19 CO2 Sensor reading the serial protocol. | The ESP module can read the MH-Z19 CO2 Sensor reading the serial protocol. | ||
Revision as of 21:17, 6 April 2017
Introduction
This Plugin in currently only available in the latest build on github, but should in the next official release
It may be needed to build a custom image with this plugin enabled, because this plugin needs lots of iram, which is quite limited on esp8266.
The ESP module can read the MH-Z19 CO2 Sensor reading the serial protocol.
Hardware
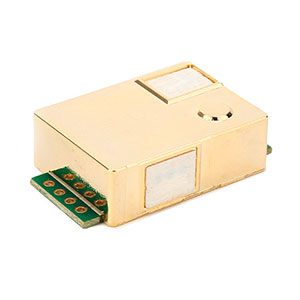
This Sensor can be bought from Aliexpress:
The sensor needs to be connected this way:
Function:  Pin MH-Z19	    ESP8266
VCC            6            3.3V
GND            7            GND
RX             2            1st GPIO specified in Device-settings
TX             3            2nd GPIO specified in Device-settings
Software
Plugin is based upon SenseAir plugin by Daniel Tedenljung info__AT__tedenljungconsulting.com Additional features based on https://geektimes.ru/post/285572/ by Gerben (infernix__AT__gmail.com)
ESP Easy
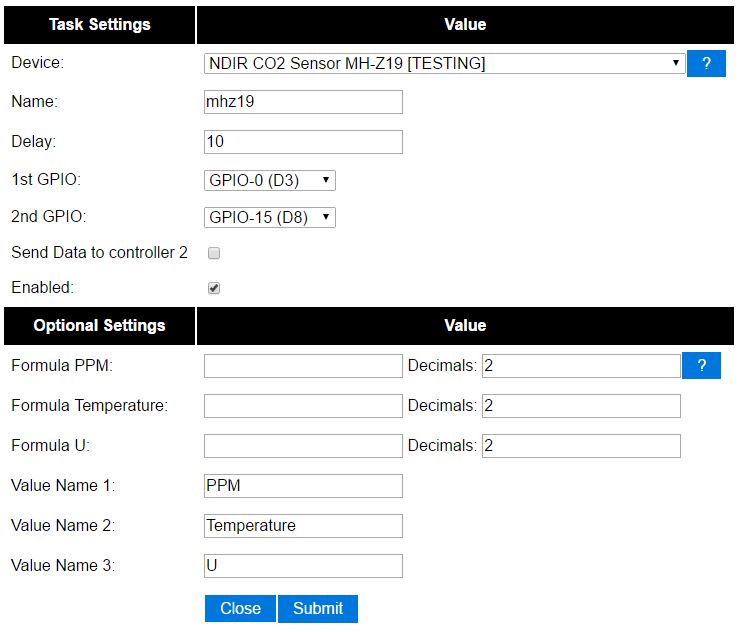
Use the device tab on the ESP Easy webinterface and create a new task by editing one of the available tasks. Select "NDIR CO2 Sensor MH-Z19 [TESTING]" from the dropdown box.
Select the GPIO Ports where you connected the RX and TX lines to.

