Difference between revisions of "PCA9685"
| Line 1: | Line 1: | ||
| + | {{Preliminary}} | ||
| + | |||
= Introduction = | = Introduction = | ||
The number of GPIO pins on the ESP module can be expanded with a PWM Expander. We will use the PCA9685 that provides 16 more pins that can be used as PWM output. This way it becomes possible to control 16 dimmable LED's | The number of GPIO pins on the ESP module can be expanded with a PWM Expander. We will use the PCA9685 that provides 16 more pins that can be used as PWM output. This way it becomes possible to control 16 dimmable LED's | ||
Revision as of 20:44, 22 November 2015
Information on this page is based on preliminary development. Beware that functionality may be incomplete, not fully tested and subject to change. It may even be removed in future releases if it turns out be unstable or based on erroneous interpretation of the operation of third-party technology. At this stage, we provide the information to support development and testing.
Introduction
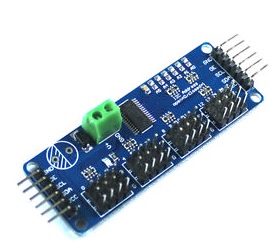
The number of GPIO pins on the ESP module can be expanded with a PWM Expander. We will use the PCA9685 that provides 16 more pins that can be used as PWM output. This way it becomes possible to control 16 dimmable LED's
Hardware
The PCA9685 needs to be connected through the I2C interface. This chip is compatible with 3V3 and it can be connected to the ESP without levelshifters..
Connections
 PCA9685 	ESP-01
 GND 	 	GND
 VCC    	VCC
 SDA		GPIO 0
 SCL		GPIO 2
Software
ESP Easy
The device is listed in the device dropdown, but you don't have to select it. There's actually nothing to configure there and the logic will work without selecting this plugin. You can use the control web page to set PWM levels using http commands to ESP Easy.
Output
You can control output pins on this chip with the following http command:
http://<ESP IP address>/control?cmd=pcapwm,<pin>,<Level>
Pin can be chosen between 0 and 15. Level can be set between 0 and 4095.

