Difference between revisions of "Tutorial OpenHAB Switch"
| (2 intermediate revisions by the same user not shown) | |||
| Line 1: | Line 1: | ||
| − | This tutorial will guide you to connect your first ESP Easy to OpenHAB to control a digital output on the ESP (i.e. to drive a relay). We expect that you have a working OpenHAB setup, a MQTT broker running and have loaded the ESP Easy firmware onto your ESP. | + | {{Preliminary}} |
| + | |||
| + | This tutorial will guide you to connect your first ESP Easy to OpenHAB to control a digital output on the ESP (i.e. to drive a relay). We expect that you have a working OpenHAB setup, a MQTT broker running and have loaded the ESP Easy firmware onto your ESP. In our testlab, we ran OpenHab on Windows and the Mosquitto MQTT broker on a RaspberryPI (it was already there due to some earlier experiments...) | ||
In this tutorial, we use a simple switch demonstration so you don't need a real sensor attached to your ESP. A barebone ESP-01 and a LED + resistor should be sufficient for this tutorial. It will mainly demonstrate the basis steps to connect ESP to OpenHAB by using the ESP Easy firmware. | In this tutorial, we use a simple switch demonstration so you don't need a real sensor attached to your ESP. A barebone ESP-01 and a LED + resistor should be sufficient for this tutorial. It will mainly demonstrate the basis steps to connect ESP to OpenHAB by using the ESP Easy firmware. | ||
| Line 15: | Line 17: | ||
We had our broker service running on 192.168.0.8, please change to your local situation. | We had our broker service running on 192.168.0.8, please change to your local situation. | ||
| − | = | + | = Add the MQTT binding file = |
If not done already, add the MQTT binding jar to the addon folder. We added this file: | If not done already, add the MQTT binding jar to the addon folder. We added this file: | ||
Latest revision as of 13:28, 2 September 2015
Information on this page is based on preliminary development. Beware that functionality may be incomplete, not fully tested and subject to change. It may even be removed in future releases if it turns out be unstable or based on erroneous interpretation of the operation of third-party technology. At this stage, we provide the information to support development and testing.
This tutorial will guide you to connect your first ESP Easy to OpenHAB to control a digital output on the ESP (i.e. to drive a relay). We expect that you have a working OpenHAB setup, a MQTT broker running and have loaded the ESP Easy firmware onto your ESP. In our testlab, we ran OpenHab on Windows and the Mosquitto MQTT broker on a RaspberryPI (it was already there due to some earlier experiments...)
In this tutorial, we use a simple switch demonstration so you don't need a real sensor attached to your ESP. A barebone ESP-01 and a LED + resistor should be sufficient for this tutorial. It will mainly demonstrate the basis steps to connect ESP to OpenHAB by using the ESP Easy firmware.
Contents
Get MQTT working
To be able to communicate with devices like the ESP, we have to get MQTT support into OpenHAB. This step has to be done only once in your setup.
We have used the Demo on OpenHAB to develop this support and we will be using that as a start.
In case MQTT is not setup already, please change the openhab.cfg file:
mqtt:localbroker.url=tcp://192.168.0.8:1883
mqtt:localbroker.clientId=openHAB
We had our broker service running on 192.168.0.8, please change to your local situation.
Add the MQTT binding file
If not done already, add the MQTT binding jar to the addon folder. We added this file:
org.openhab.binding.mqtt-1.7.1.jar
Change sitemap
You need to configure a switch device for this demo, we added the following to the demo sitemap:
Frame label="MQTT Test"{
 Switch item=MQTTLED label="LED"
}
Change items
And we have to configure how this device will work, in this case MQTT. Add following line to your items file:
Switch MQTTLED {mqtt=">[localbroker:/openhabdemo/gpio/2:command:ON:1],>[localbroker:/openhabdemo/gpio/2:command:OFF:0]"}
We tell openhab to use MQTT for this switch, communicate with the broker named "localbroker" and publish this to /openhabdemo/gpio/2 where "openhabdemo" is the name of the ESP module, "gpio" tells ESP what to do with the state value and "2" is the GPIO pin number that should be switched. And we tell that ON sends value 1 and OFF sends value 0.
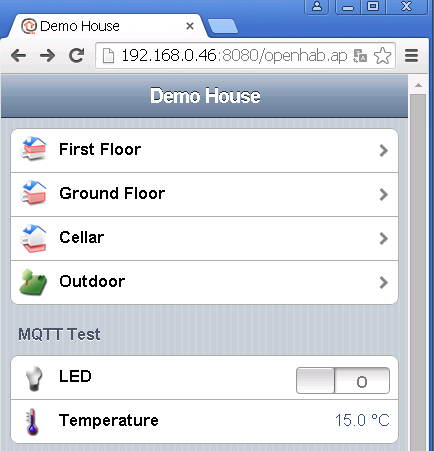
Finally launch the OpenHAB gui and it should look like this:
Connect the ESP Easy to your network
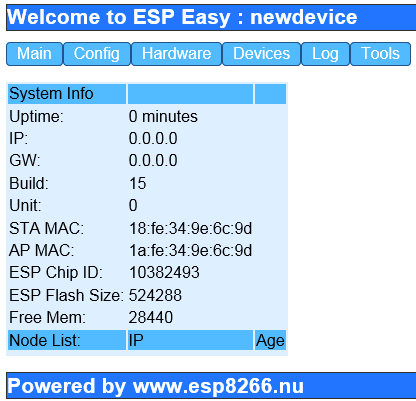
If you have your ESP board loaded with ESP Easy firmware, powerup the unit and an Access point named "ESP_0" should appear. Connect to this access point and browse to http://192.168.4.1. If all went well, the following screen should be shown:
Click the "Config" button
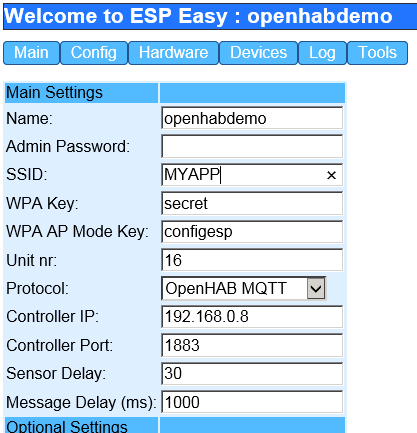
Configure at least the following settings to get you started:
SSID
WPA
Protocol OpenHAB MQTT
Controller IP = your MQTT Broker IP
Controller Port = your MQTT broker server port, default should be 1883
Click the "Submit" button
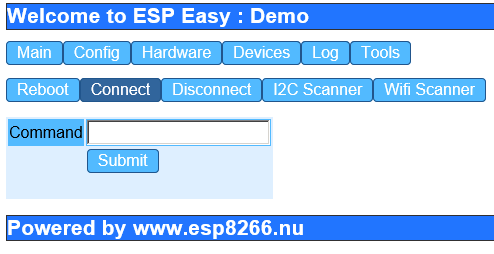
Click the "Tools" button and Click "Connect"
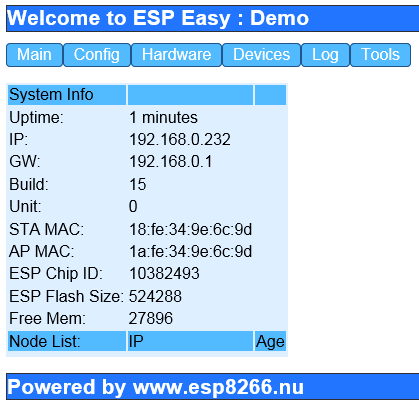
Go back to "Main" and chech the status. It should have an IP address:
From here on, you should start using http://192.168.0.232 to connect to your ESP device.
Since this will be an output device, we do not have to configure any devices on the ESP.
Testing
Connect an LED or Relay board to the GPIO-2 pin on the ESP and toggle the LED button in OpenHAB webgui. The LED of Relay should respond almost immediately!

