Difference between revisions of "ESPEasy"
Grovkillen (talk | contribs) m (→Get started) |
Grovkillen (talk | contribs) m (→Get started) |
||
| Line 45: | Line 45: | ||
<br/>↓<br/> | <br/>↓<br/> | ||
<span style="color: white; background:#0077dd">4. Restart ESP. WiFi <nowiki />"AP ESP_0" will appear</span> | <span style="color: white; background:#0077dd">4. Restart ESP. WiFi <nowiki />"AP ESP_0" will appear</span> | ||
| − | <br/><span style="font-size:60%"> | + | <br/><span style="font-size:60%">If you're not automatically taken to the log-in page, browse to 192.168.4.1</span> |
<br/>↓<br/> | <br/>↓<br/> | ||
<span style="color: white; background:#0077dd">5. Search for you routers WiFi and connect</span> | <span style="color: white; background:#0077dd">5. Search for you routers WiFi and connect</span> | ||
Revision as of 19:48, 23 June 2017
|
Contents
- 1 Introduction
- 2 Get started
- 3 Supported Hardware
- 4 Supported Sensors/Actuators
- 5 OLD Supported Sensors/Actuators List
- 6 Modded Hardware Products
- 7 Tutorials
- 8 Hardware Tips 'n Tricks
- 9 Examples
- 10 Loading firmware
- 11 Protocol selection
- 12 Configuration
- 13 ESP Easy web interface
- 14 Command Reference
- 15 System variables Reference
- 16 Tutorial Rules
- 17 Support and discussion
- 18 Hardware page
Introduction
The ESP Easy firmware can be used to turn the ESP module into an easy multifunction sensor device for Home Automation solutions like Domoticz. Configuration of the ESP Easy is entirely web based, so once you've got the firmware loaded, you don't need any other tool besides a common web browser.
The ESP Easy firmware is currently at build R120 an looks stable enough for production purposes as long as it's being used as a sensor device.
ESP Easy also offers limited "low level" actuator functions but due to system instability, this could be less useful in real life applications.
Get started
Getting started with the ESP Easy takes a few basic steps. In most cases your ESP module comes with the AT firmware or the NodeMCU LUA firmware. We need to replace the existing firmware with the ESP Easy firmware. We provide a (Windows only) flashtool to make this process an easy job.
1. Download firmware as binary including flash tool
↓
2. Connect the ESP to Windows PC
Using either USB/UART of board or separate USB/TTL adapter
↓
3. Write firmware using flash tool
Note necessity for GPIO to be LOW to enter flashmode
↓
4. Restart ESP. WiFi "AP ESP_0" will appear
If you're not automatically taken to the log-in page, browse to 192.168.4.1
↓
5. Search for you routers WiFi and connect
↓
6. Reconnect to your WiFi and enter IP adress shown on previous screen
Supported Hardware
ESP Easy can be installed/flashed on nearly every piece of Hardware that has an ESP8266 built-in, newest 2.0.0 version even does support the ESP8285 (basically an ESP8266 with built-in 1M Flash). Please see the list here for more in depth detail about the hardware.
Supported Sensors/Actuators
The in depth list of devices (sensors and actuators) is found here.
OLD Supported Sensors/Actuators List
This list is being migrated to the new list found here.
| Actuators (Output) | |
|---|---|
| Servo | |
Servo 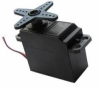
| |
| IR-Transmit | Extra IO |
IR Led 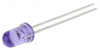 |
PCF8574 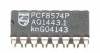
|
| PWM | Motor Shield |
PCA9685 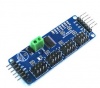 PWM GPIO 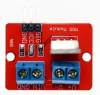 |
Adafruit Motor Shield v2 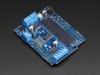
|
| Buzzer (RTTL) | |
RTTL 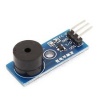
| |
| Other | ||
|---|---|---|
| LCD | OLED | Level Shifter |
| LCD Display |
OLED Display 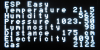 |
Level Shifter |
Modded Hardware Products
A list of (officially) modded hardware products is found here.
Tutorials
- Using the flashtool to upload the ESP Easy firmware
- Using the Arduino IDE to upload the ESP Easy firmware
- Using the ESP Easy as a simple input switch in Domoticz
- Using the ESP Easy to control a LED of Relay from OpenHAB
- Rules, a modest way to locally control something in ESP Easy
- GlobalSync
Hardware Tips 'n Tricks
Examples
Loading firmware
- Current stable: ESPEasy R120
- Old release candidate: ESPEasy R147_RC8 (is being replaced by version 2.0)
- New release candidates are on github: ESPEasy version 2.0 and higher
2.0+ firmware on 1MB modules
If you are running the stock Mega edition firmware on 1MB modules, you will find that you can no longer load newer images because there's insufficient free space to upload the image (344kB as of 2.0.0.-Dev 9 edition). You can compile smaller images to solve this issue or use a small image that has been build just to upload newer images. So you would always have to use a two-step process to renew using OTA on 1MB modules. Using the uploader image as an in-between step, you can use images up to 604kB.
The uploader uses SPIFFS so it uses the same configuration regarding SSID, WPA key and IP. It will connect to your Wifi network as usual, but it will only present this small web page:

Tutorial_ESPEasy_Firmware_Upload
Protocol selection
The ESP Easy supports several Home Automation controllers or web-services that collect sensor data.
Configuration
The ESP8266 boards are generally easy to use and understand but some precautions need to be taken when it comes to the different GPIOs available. This section tells you more about the ESPeasy setup and the ESP unit's need to know settings (GPIO boot states etc.).
ESP Easy web interface
The ESP Easy has a user-friendly web interface for all configuration settings. They are locally stored in flash memory and retained on power-off. We explain all configuration pages and settings here.
Do NOT expose the ESP Easy web interface directly to the internet, always make sure that the web interface is only reachable from "trusted/local" networks!
Command Reference
System variables Reference
Tutorial Rules
Most information on rules (=local logic on ESP without controller) can be found in the tutorials. Rules are a great way of tweaking the ESP Easy firmware to do exactly what you want without the need to tinker with any source code.
More on how is found on the Tutorial Rules page.
Support and discussion
- Forum
- IRC: #espeasy @freenode
Source code development
Sources are on Github
Want to contribute? Anyone is invited to do so, but please read this first: ESPEasyDevelopmentGuidelines
If you're new to this, follow these guides:
- Install Atom and platformio: Tutorial Install Platformio
- If you want to be send us back your changes via github follow: Tutorial preparing to work with github (otherwise skip it)
- Then you're ready for: Tutorial building and uploading with platformio
- And eventually, if you did the github stuff: Tutorial Contributing Back To ESPEasy
Hardware page
For older versions, the Hardware page has now moved to: ESP Easy web interface#Hardware page!